A soldering tutorial for the
mechanically challenged.
No modern rock musician is complete until he or she has
mastered the simple art of soldering a piece of wire to the lug of an
output jack or pot inside his/her guitar. The artist at once becomes
eternally liberated from the nagging fear of showing up at a gig
without a working guitar cable. They become empowered to overthrow
the firm grip on their pocketbooks by those high priests of guitar
repair. They come one step closer to the abyss of Geekdom.
Nothing seems more difficult, frustrating or dangerous to the
uninitiated than the clumsy wielding of a very hot and blunt
implement against the odds of metallurgy in a concerted campaign to
join three metals in an enduring, conducting union. Trust me, you too
can solder with a little reading, a small investment and a little
practice.
What you need:
i.) Get a respectable soldering iron from the ubiquitous
local Radio Shack or hardware store. Get one that has between 15
and 45 watts of heating power. The better irons have
interchangeable tips that are iron-clad copper with silver
plating. Avoid like black death, the iron with a two prong element
that plugs into the handle and is locked in place with a plastic
ring. This element will break in half the first time you really
need to do something in a hurry, not worth the decades in prison
for torching Radio Shack in a justified rage.

|
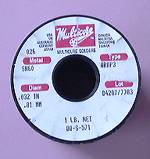
ii.) 60/40 rosin core solder in "Multi core" fine size
or equivalent.
|
|
|
iii.) An old damp sponge or damp cotton rag.
|
|
|
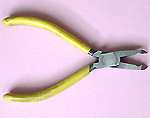
iv.) Small wirecutters
|
|
|
v.) Wire stripers
|

|
vi.) A clothespin, pair of Visegrips or small clamp of an
improvised nature.
vii.) A good light or two, I like to use those drafting table
lamps with the springs and creaks.
viii.) Steady hands (martinis all around?).
ix.) A calm, unhurried environment... OK forget I said
that.
I first learned to solder from my older brother at about
age 10. The process is so simple that it seems trivial in retrospect
but if you don't follow the simple rules you will probably never
succeed.
1) Plug the soldering iron in for about 2-5 minutes until
it has reached the necessary temperature to melt solder (500-800
degrees).
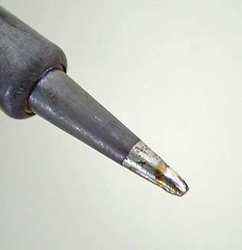
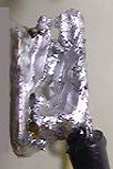
2) Wipe the tip clean on the damp sponge to remove oxidation
and immediately apply the tip to the end of the solder spool
(after unwinding a foot or two). This is called "Tinning" or
coating
|

|
|
|
Dirty tip
|
Clean tip with solder blip
|
the tip with fresh solder. Don't over do it, you just want a
little blip of solder on the tip once the whole tip has been
freshly coated. If you have a big drop wipe off the excess onto
the sponge.
|
|
|
|
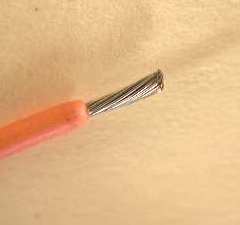
Bare wire
|
Tinned wire (brown stuff is rosin)
|
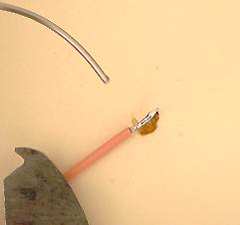
3) Apply the blip on the tip to the end of the wire you wish to
solder (after you have stripped off some insulation) and
simultaneously apply more solder to the opposite side of the wire
using your other hand. (Have you noticed that you don't have more
than two hands and that they are already occupied in holding the
soldering iron and the wire? This is where soldering gets it's bad
reputation so now you have to improvise. You can hold two things
and leave the third to fend for it's self on the table or you can
make an attempt to anchor it down with the clothes pin or
Visegrips or a small paper weight...) You are "tinning" the
wire.
4) Next, "tin" the lug of the pot or jack or whatever it is you
want to solder the wire to.
4 1/2) Now is a good time to wipe the tip of the iron off again
and apply a fresh coat of solder.
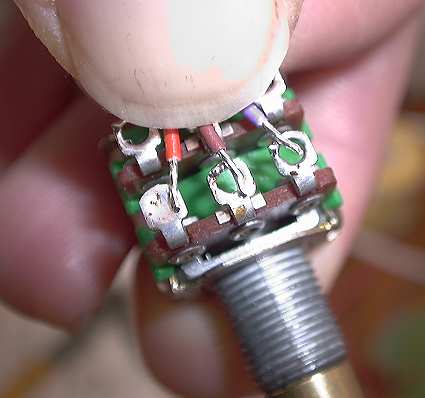
5) Quickly find a way to hold the wire in place against the lug
and
|
|
|
Using the thumbnail to hold wires in
place...
|
apply the soldering iron and solder to the joint simultaneously
and watch as miraculously the solder envelopes the whole thing in
a little puff of white smoke while you choke uncontrollably on the
acrid fumes and worry about lead poisoning. (Did you count how
many hands you needed for that simple operation? Yes that's right
4 hands). Like any tricky operation, you need to spend a bit of
time preparing the O.R. first. If I can't get fresh solder into
the joint as I'm heating it with the iron, I might put a big blip
of solder on the tip and let that flow into the joint. You must
move quickly though before the blip gets skinned over with a nasty
oxide that will mess up your joint.
1.5) Do a dry run or two before you tackle the finish on
your 1957 Les Paul, leaving telltale traces or burnt lacquer and
wood to testify to your hours of lost youth...
6) Make sure you don't jiggle the parts while the joint
is cooling, this will result in the notorious "cold solder joint",
a repository for every gremlin and ghost ever to haunt
electronics. You must hold things absolutely still for at least a
few seconds
|
|
|
|
|
|
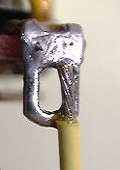
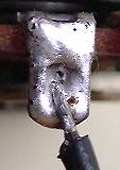
Dry joint, needs more solder
|
Cold joint, parts moved while solder
cooled
|
Cold Joint, wire wasn't held in place
|
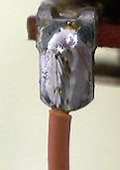
Purrrfect, note the lug's hole is full and the
surface is shiny all around
|
Rules to live by:
a.) Clean everything before during and after each joint
(keeps the DEA happy). That means using fresh wire, fresh solder,
fresh parts. Remove excess solder and rosin from the finished
joint. Scrape or sand old wires and lugs until they shine.
b.)Don't use "ACID CORE" solder for electronics applications,
it will degrade over time as the acid eats into the joint. Rosin
and acid are called "fluxes", they help clean away the last traces
of oxidation from the hot metal and keep oxigen away.
c.) The damp sponge, as well as cleaning the soldering iron
tip, helps keeps the soldering iron from getting too hot and
messing up stuff like transistors and intergrated circuits that
are heat sensitive.
d.) You can't heat up an old joint or a new joint without
putting the little blip of fresh solder on the soldering tip
first, it helps the heat flow into the joint.
e.) Molten solder will always move towards the hottest part of
the joint, I don't know why but it just does. This can be used to
your advantage if you really are clever.
f.) Soldering is nearly instantaneous, if the solder doesn't
flow around the work in 1/4 of a second then something is wrong
and you need to start over again.
g.) Test everything right after you solder. Don't unplug the
iron first, as that will guarantee that you screwed it up.
h.) Don't let the joint move until it has cooled enough to set,
it should look mirror shiny all around. What this means is careful
setup and "jigging" of the wires and parts so that everything is
held in close alignment while you concentrate on the iron and
solder.
i.) Don't inhale that smoke, it might be bad for you. I'd use a
little computer "muffin fan" to blow it away from me but I don't
have one..
j.) Practice. Practice. Practice! Remember that your new skills
won't help you if you don't have your tools with you on the
gig.
k.) Reward yourself for a successful soldering adventure with a
beer or three, you deserve it (but wait until after your first set
maybe).
Copywrite 2001 David King Bass Guitar Systems